MySQL Pipe logo Setup Guide

Getting Started with MySQL Pipe

Go from an S3 bucket of database dumps to a fresh local copy in a few minutes: create a read-only AWS key, add it to the app, and set up your first import.

Download MySQL Pipe macOS · Apple Silicon · free · updates itself

Before you start

Requirements

Step 1

Create a Read-Only AWS Key

We recommend a dedicated IAM user that can only read your backup folder. In the AWS Console:

  1. IAM → Users → Create user. Name it something like mysql-pipe-reader. Do not give it console access.
  2. Choose Attach policies directly → Create policy → JSON. Paste the policy below, replacing YOUR-BUCKET and backups/mysql with your own bucket and path. Name the policy (e.g. mysql-pipe-read-backups), create it, attach it to the user, and finish creating the user.
  3. Open the user → Security credentials → Create access key. Pick the use case Application running outside AWS. Copy the Access key ID and Secret access key — the secret is only shown once.
IAM policy (JSON)
{
  "Version": "2012-10-17",
  "Statement": [
    {
      "Sid": "ListBackupFolder",
      "Effect": "Allow",
      "Action": "s3:ListBucket",
      "Resource": "arn:aws:s3:::YOUR-BUCKET",
      "Condition": { "StringLike": { "s3:prefix": ["backups/mysql/*"] } }
    },
    {
      "Sid": "ReadBackups",
      "Effect": "Allow",
      "Action": "s3:GetObject",
      "Resource": "arn:aws:s3:::YOUR-BUCKET/backups/mysql/*"
    }
  ]
}

Step 2

Add the AWS Profile in MySQL Pipe

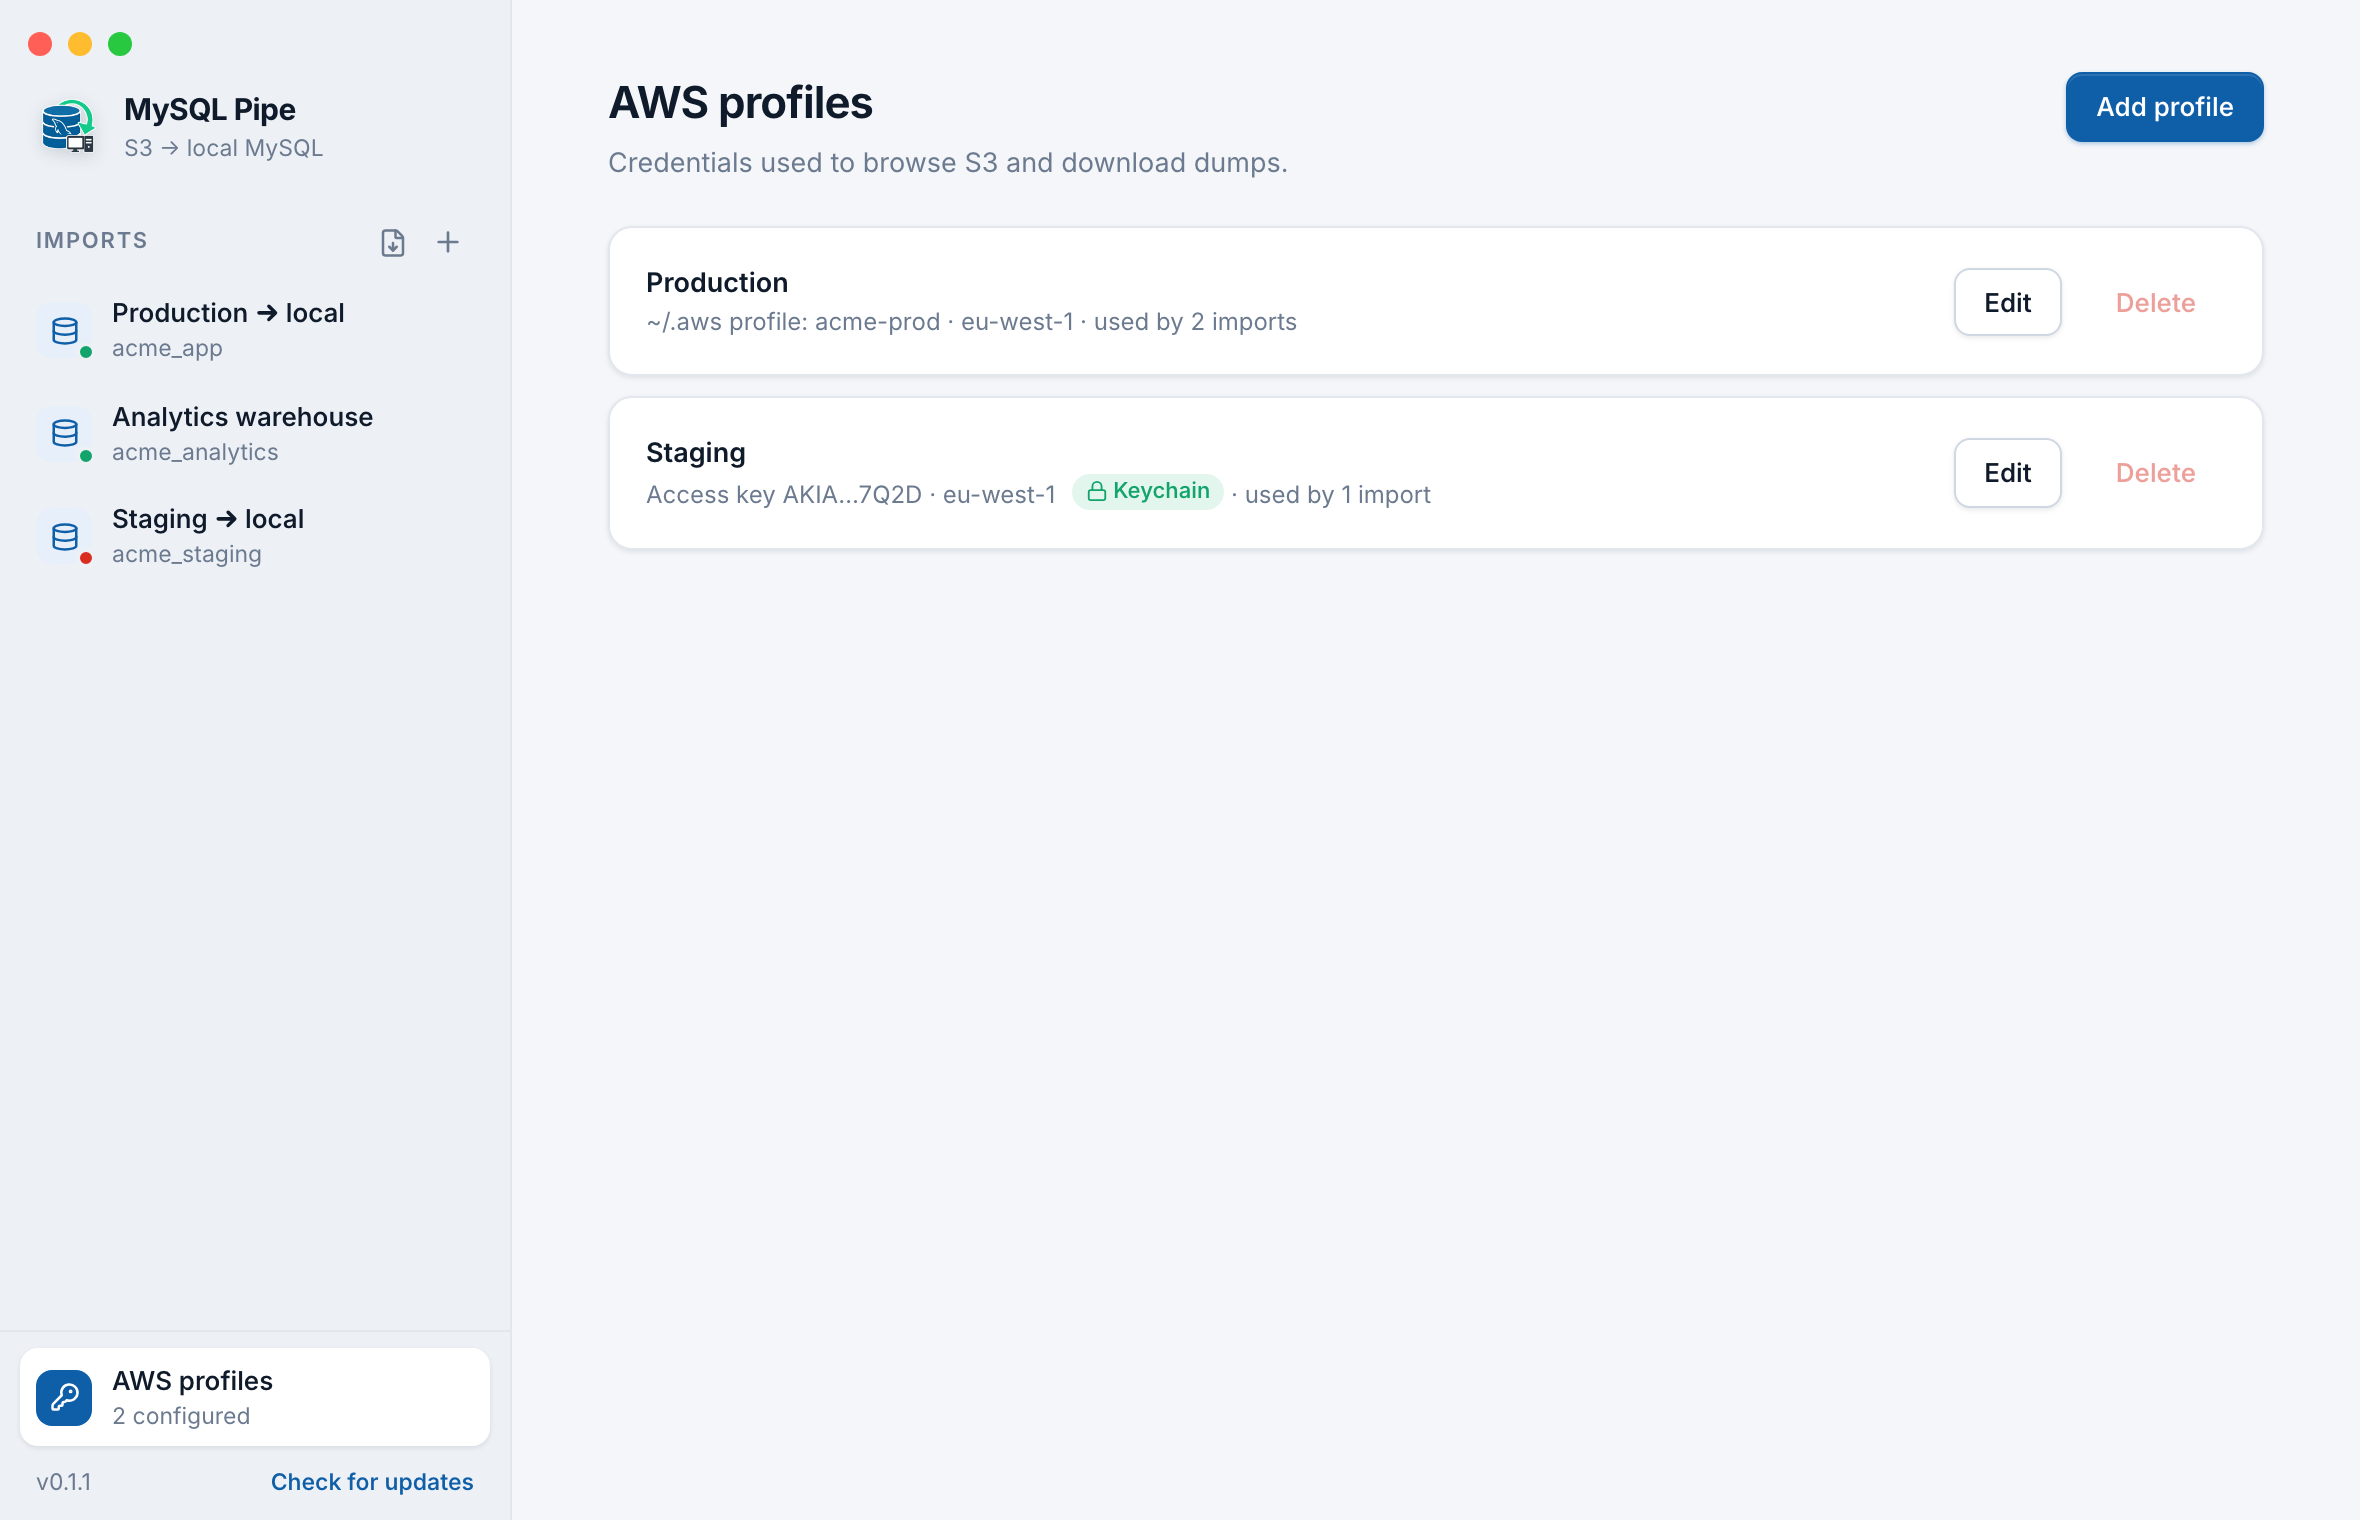
  1. Click AWS profiles at the bottom of the sidebar, then Add profile.
  2. Give it a display name (e.g. “Production backups”). Region is optional — the app detects the bucket's region automatically.
  3. Choose Access keys and paste the Access key ID and Secret access key. Or choose Use ~/.aws profile and pick a profile name.
  4. Click Test connection. You should see “Connected as arn:aws:iam::…”. For a restricted key it also notes that the key can't list all buckets — that's fine.
  5. Click Save profile. The secret key is stored in the macOS Keychain, never in a plain file.
MySQL Pipe AWS profiles screen listing a ~/.aws profile named Production and an access-key profile named Staging with a Keychain badge

Step 3

Create an Import Config

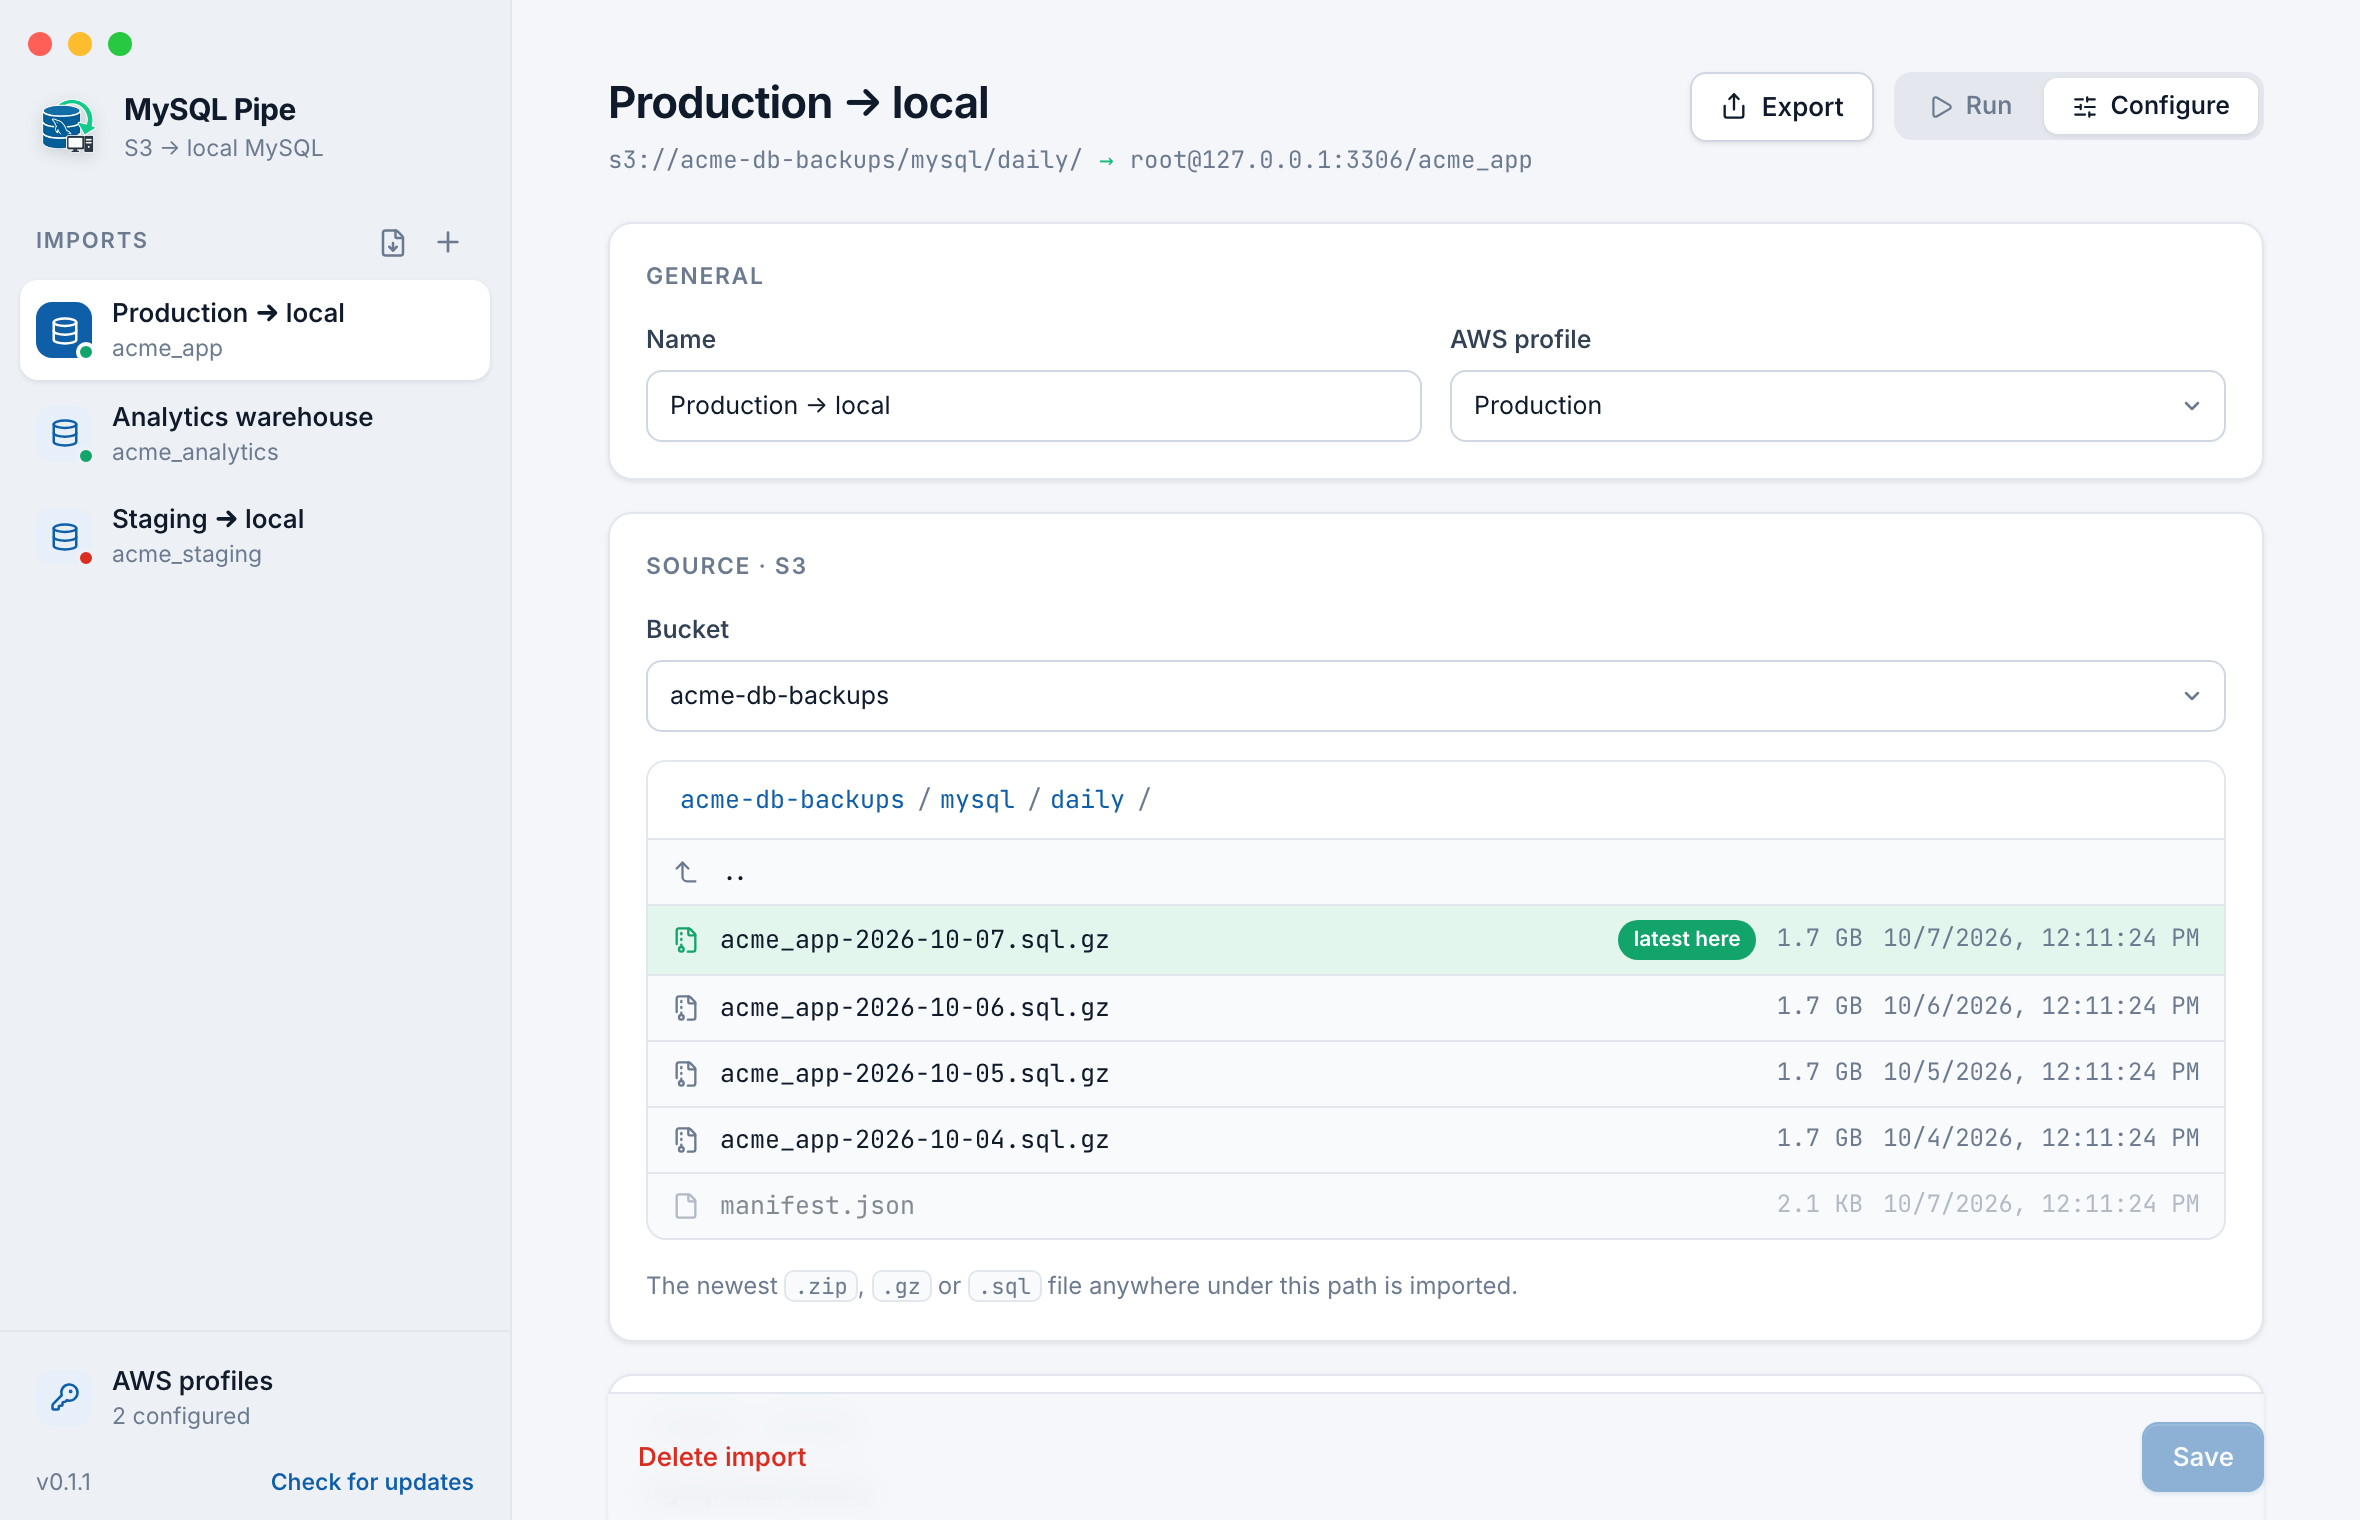
  1. Click + next to “Imports” in the sidebar. The Configure tab opens.
  2. General: enter a name (e.g. “Production → local”) and choose the AWS profile from step 2.
  3. Source · S3: pick the bucket from the list, or type it — you can paste a full s3://your-bucket/backups/mysql/ URL and it's split into bucket and path for you. Set the Path. The S3 browser below lists the files and highlights the newest dump as “latest here”. The newest .zip / .gz / .sql anywhere under the path is what gets imported.
MySQL Pipe Configure tab with the import name, AWS profile, bucket picker, and S3 browser highlighting the newest .sql.gz dump as latest here
  1. Target · MySQL:
    • The mysql client path is filled in automatically.
    • Set host (default 127.0.0.1), port, user, and password. The password is stored in the Keychain too.
    • Click Load databases and pick the database to replace, or type a new name.
    Heads up: the target database is dropped and recreated on every import.
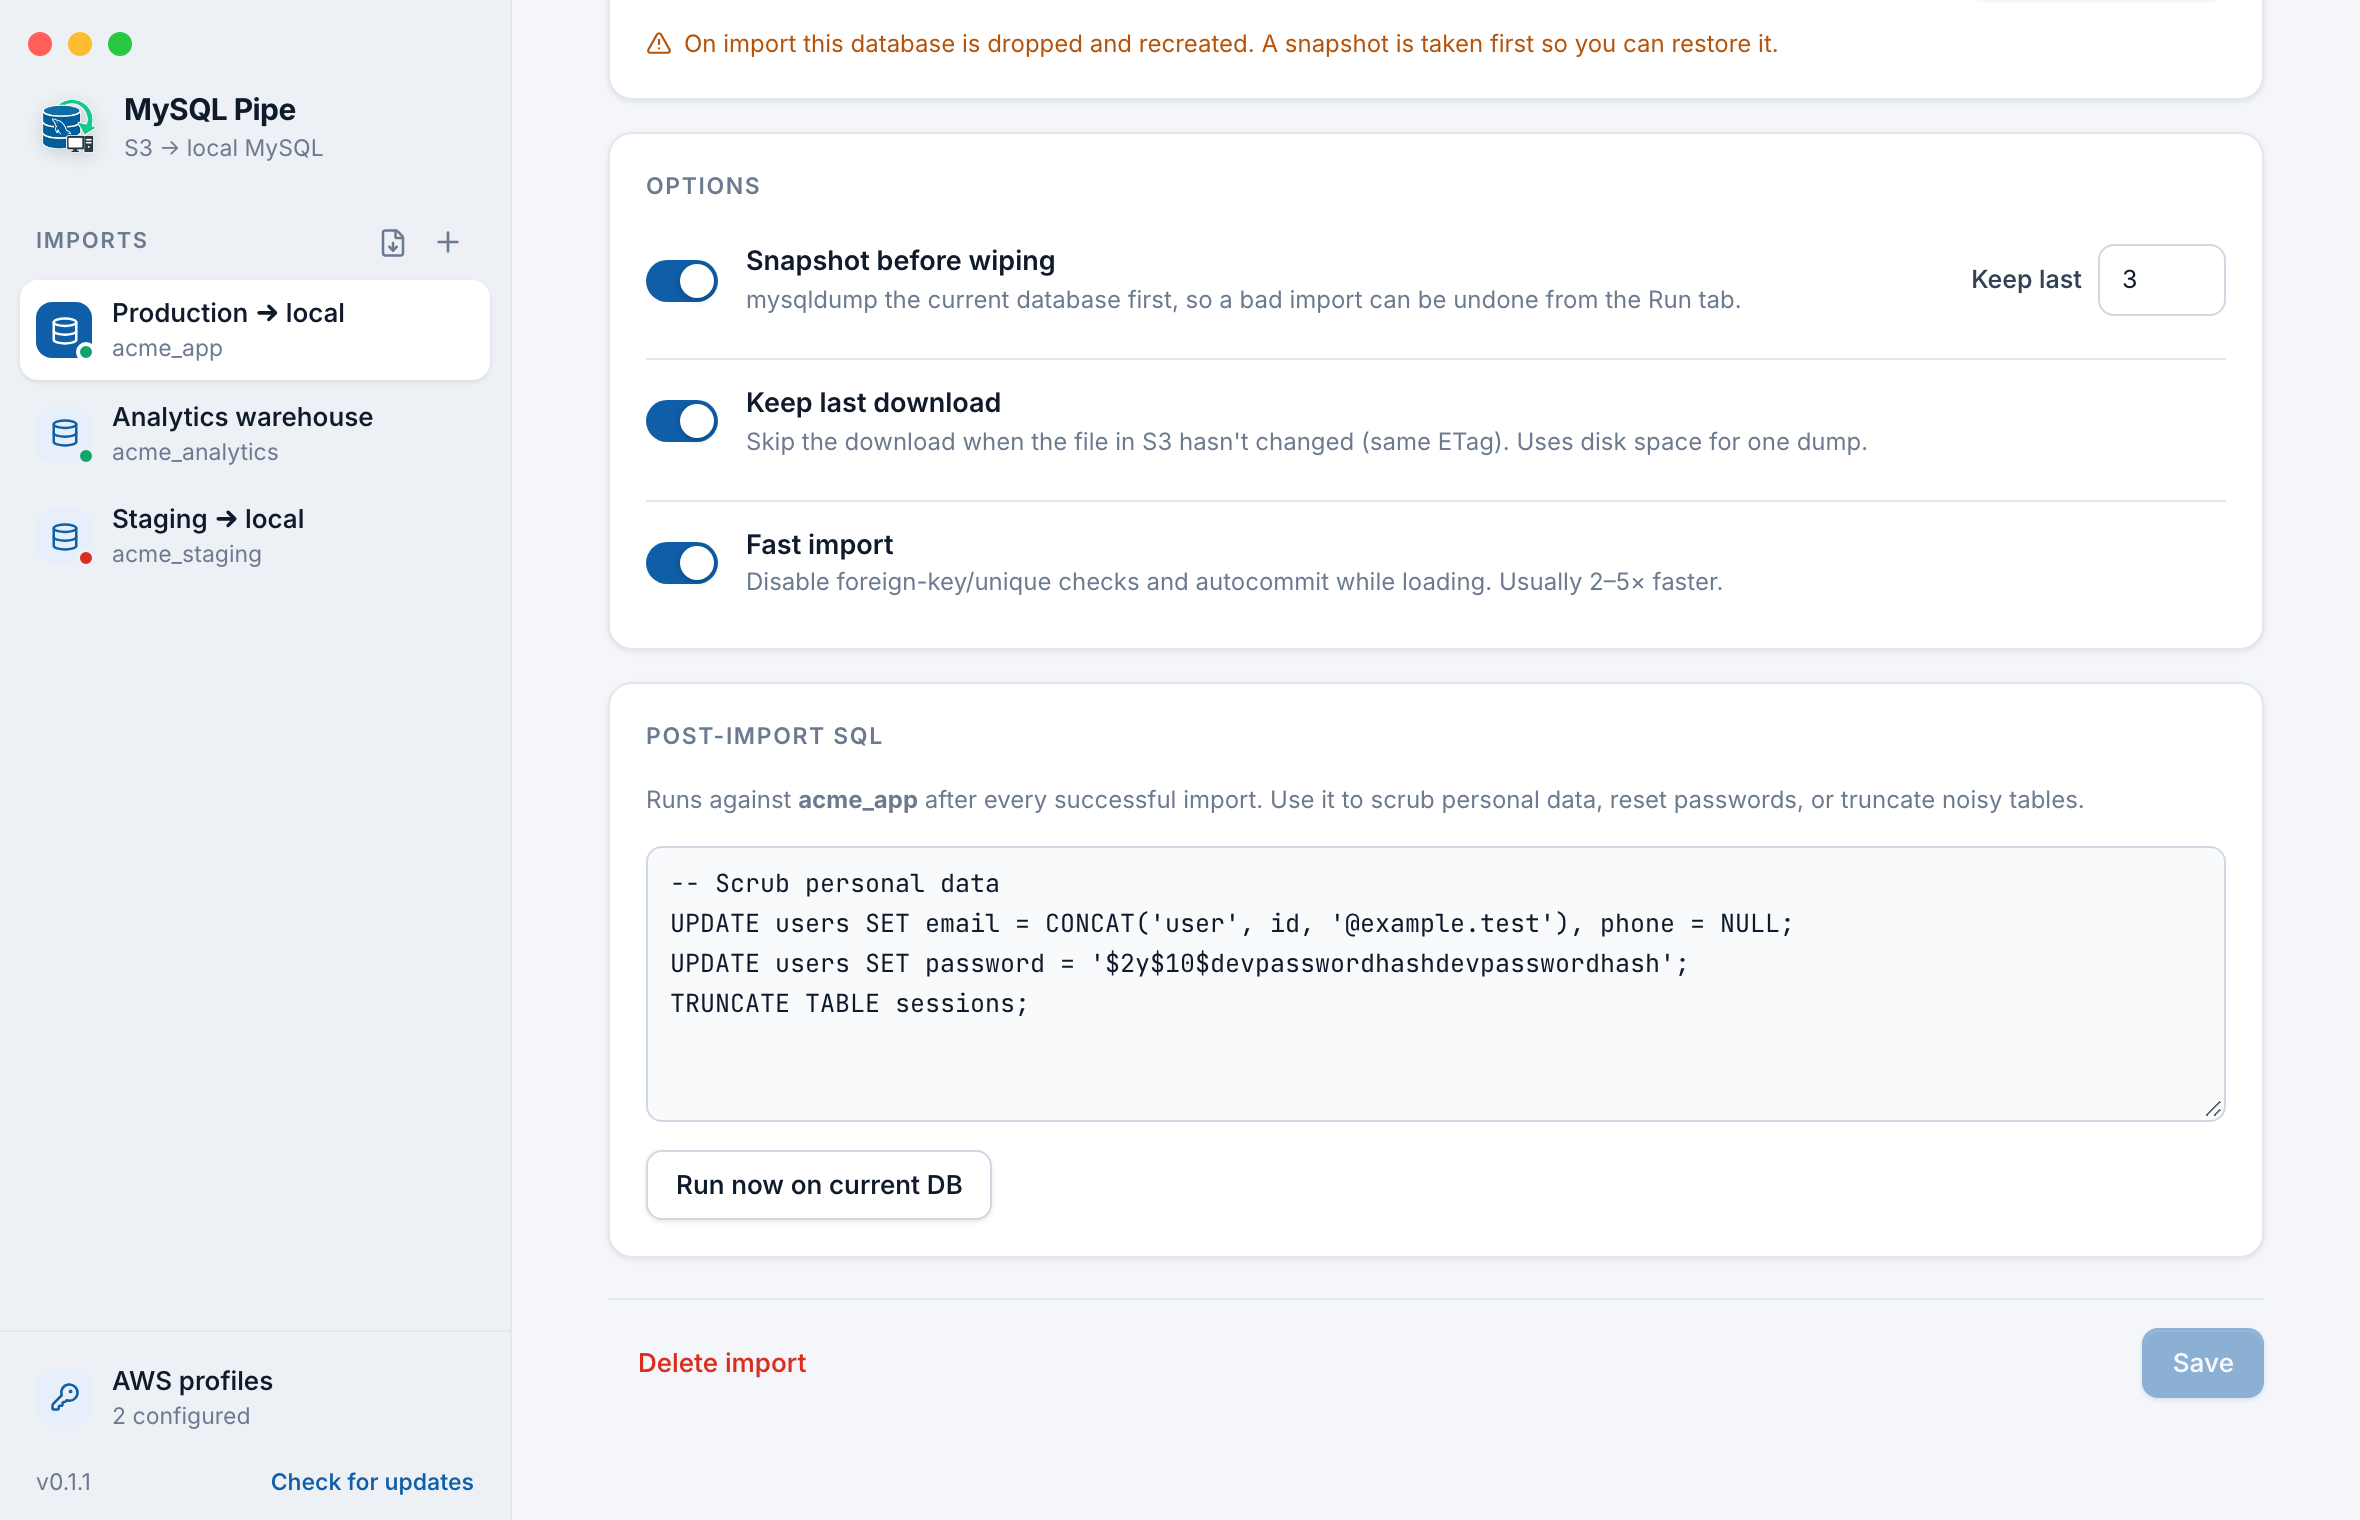
  2. Options:
    • Snapshot before wiping (on by default, keeps the last 3): the current database is backed up first, so you can restore it from the Run tab.
    • Keep last download: skips re-downloading when the file in S3 hasn't changed.
    • Fast import: turns off foreign-key and unique checks while loading — usually 2–5× faster.
  3. Post-import SQL (optional): SQL that runs after every import — for example, to scrub production data. Click Run now on current DB to test it.
    Post-import SQL
    UPDATE users SET email = CONCAT('user', id, '@example.test');
    TRUNCATE TABLE sessions;
  4. Click Save.
MySQL Pipe import options with Snapshot before wiping, Keep last download, and Fast import turned on, and a post-import SQL editor with statements that scrub user data

Step 4

Run It

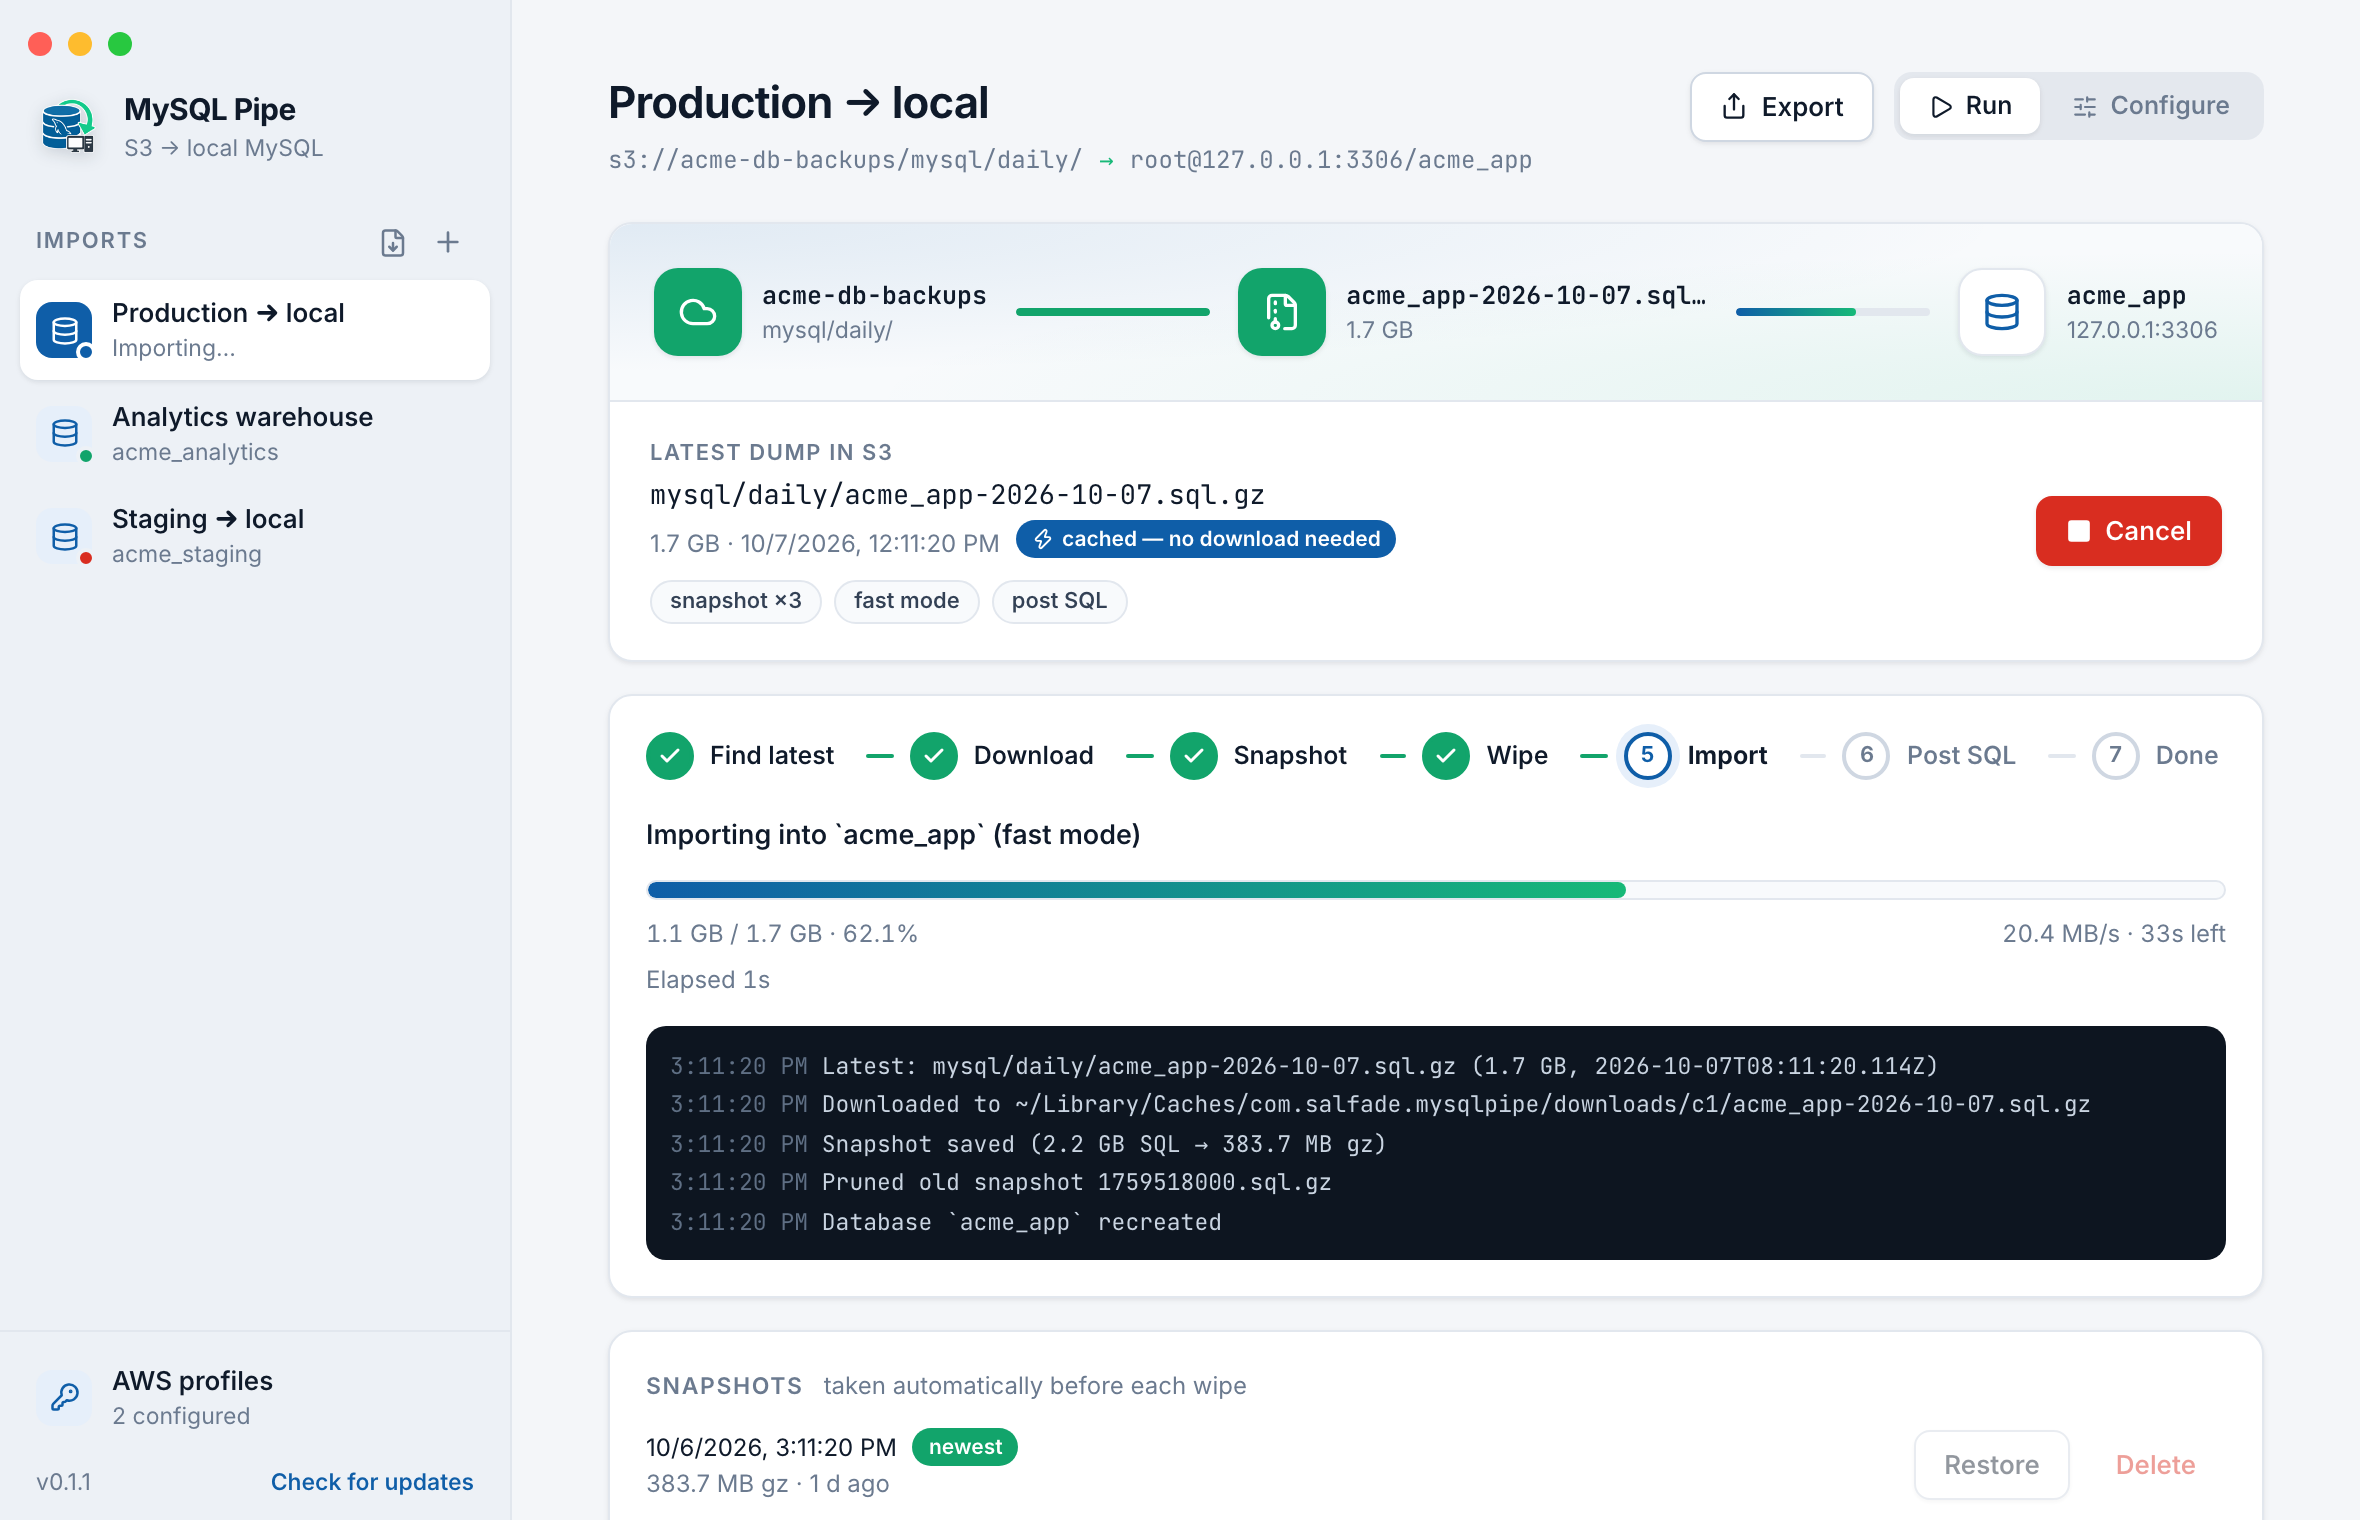
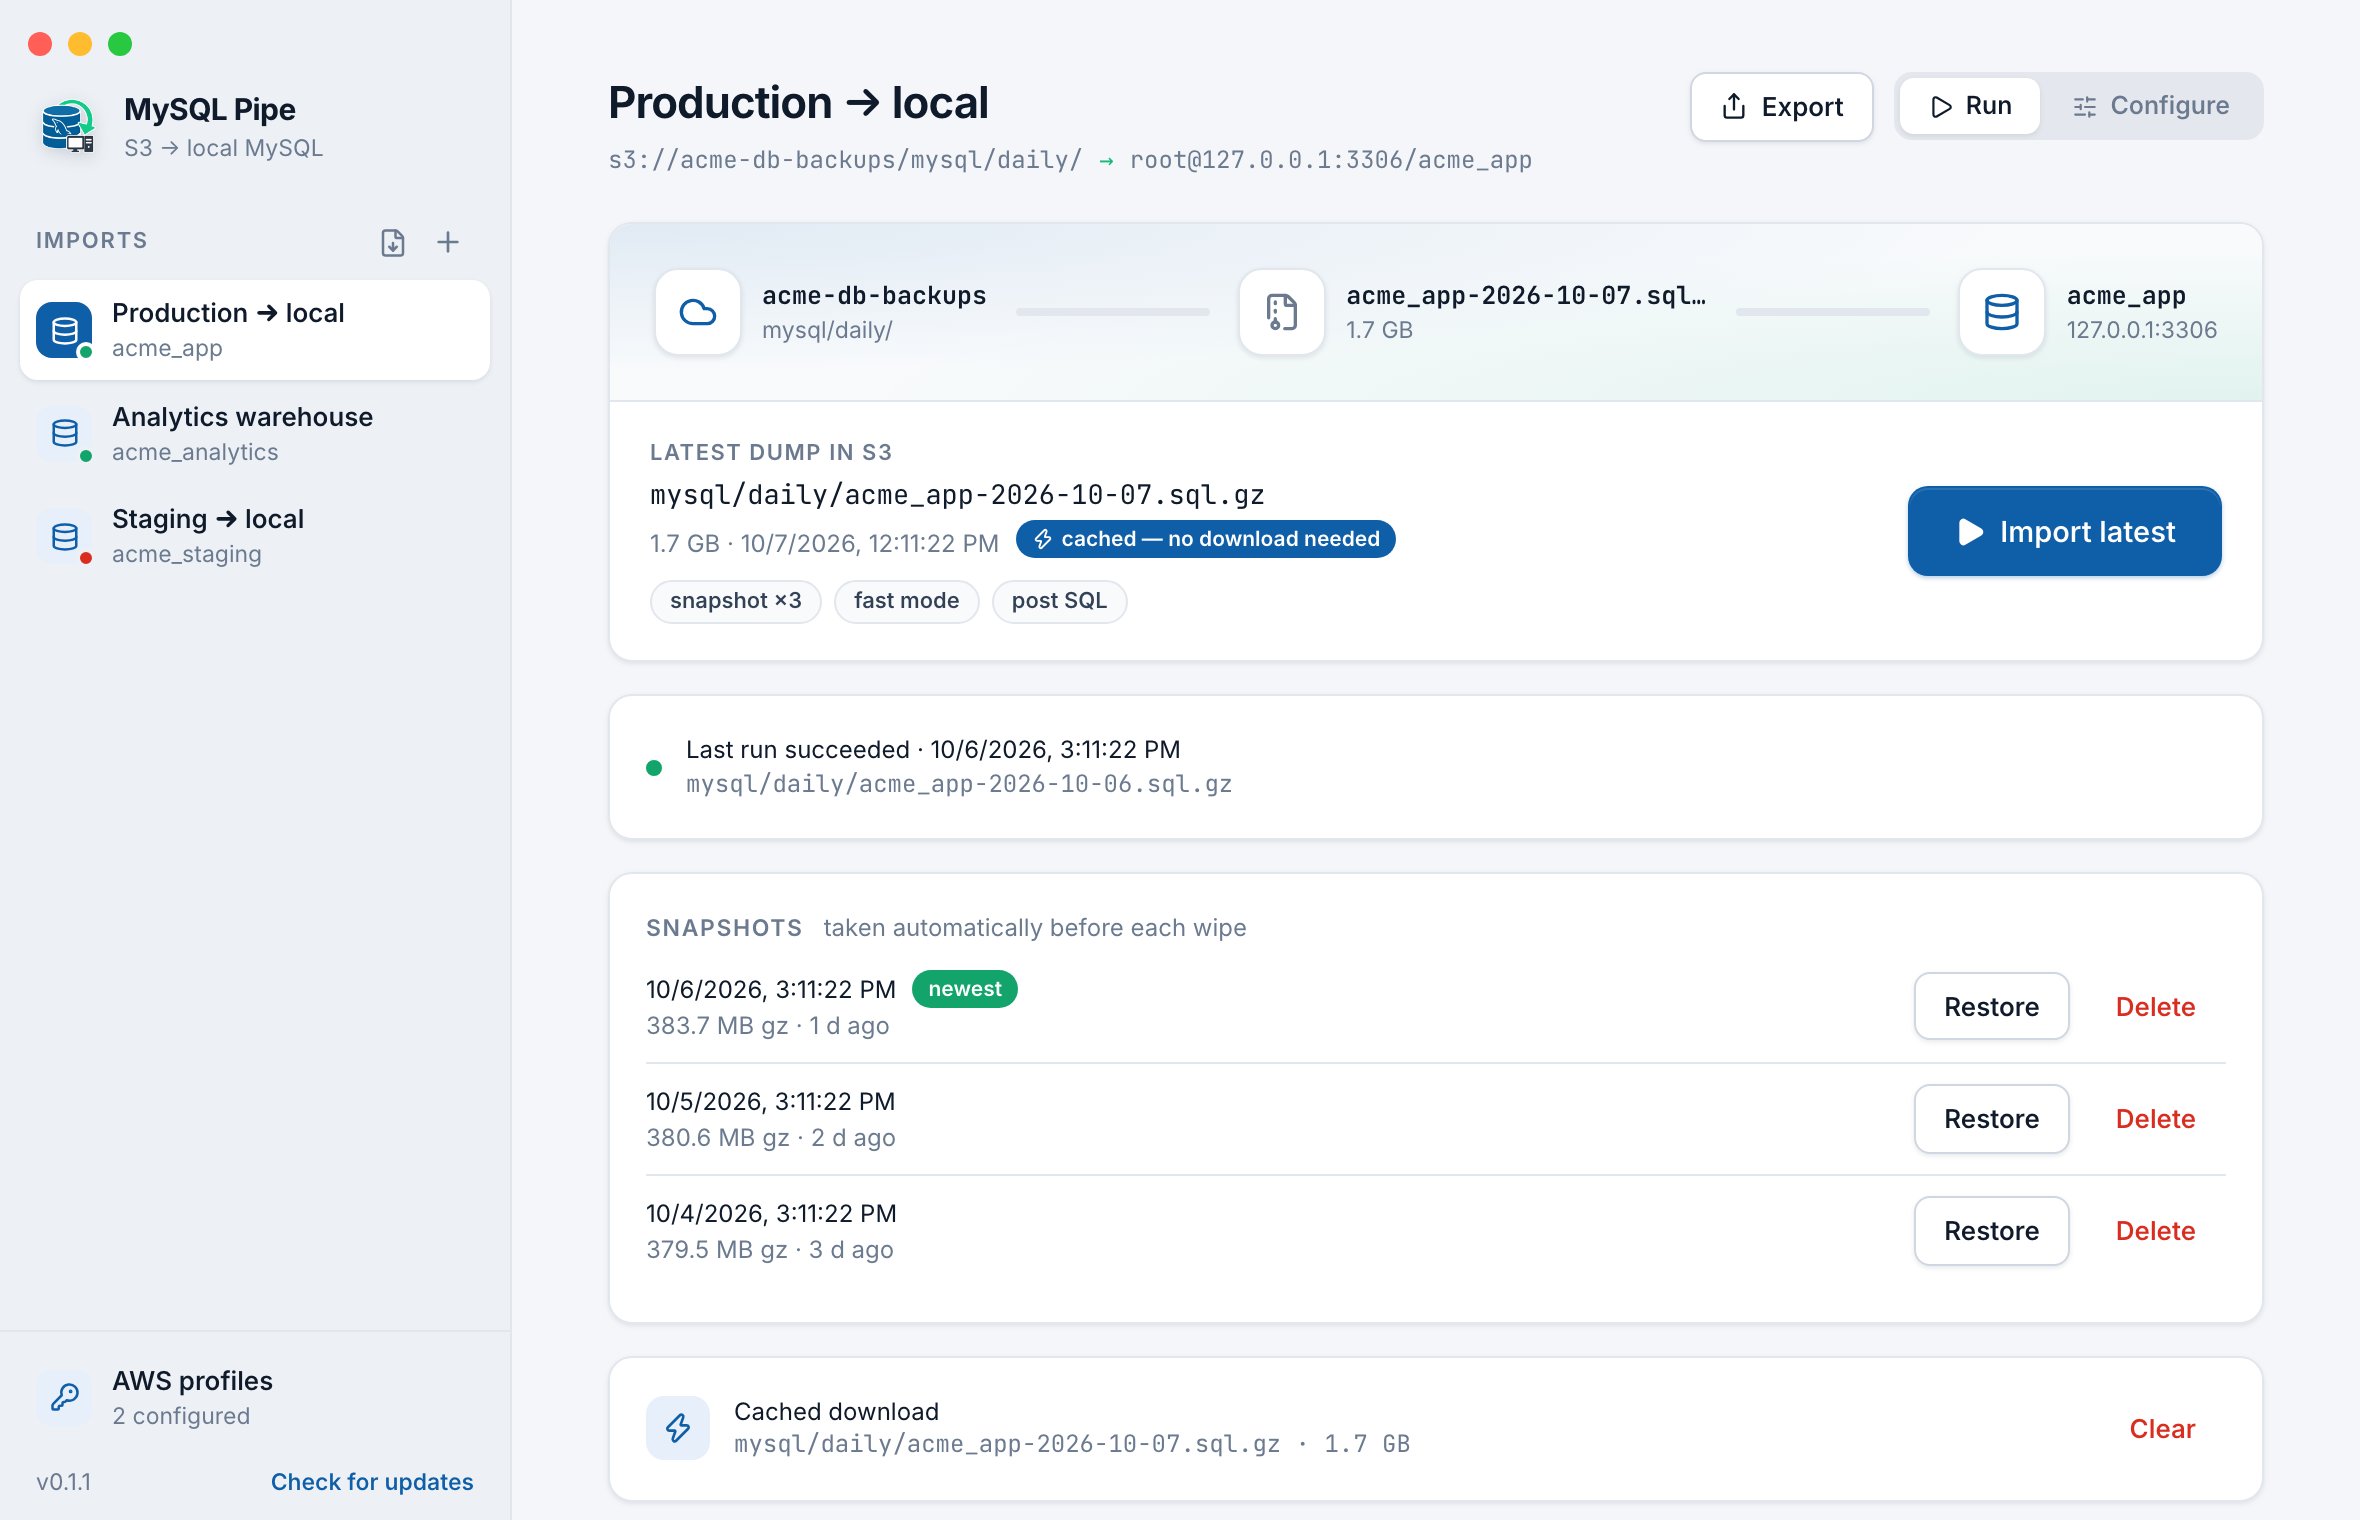
  1. Open the import, go to the Run tab, click Import latest, and confirm.
  2. Watch it work: find latest → download → snapshot → wipe → import → post SQL.
  3. You can cancel at any time.
MySQL Pipe Run tab mid-import, showing the S3-to-MySQL pipeline, completed steps, import progress bar with speed and ETA, and the live log
  1. Snapshots are listed below, each with Restore and Delete.
MySQL Pipe Run tab after a successful run, with the Import latest button, last run status, three snapshots with Restore and Delete buttons, and the cached download

Tip: share imports with your team

Export (top right of an import) saves a .mysqlpipe.json file with no credentials in it. A teammate imports it with the file icon next to “Imports”, and the app asks for their own AWS key and MySQL password.

Need Custom Data Tooling?

We build database pipelines, backup automation, and internal developer tools for startups and enterprises.